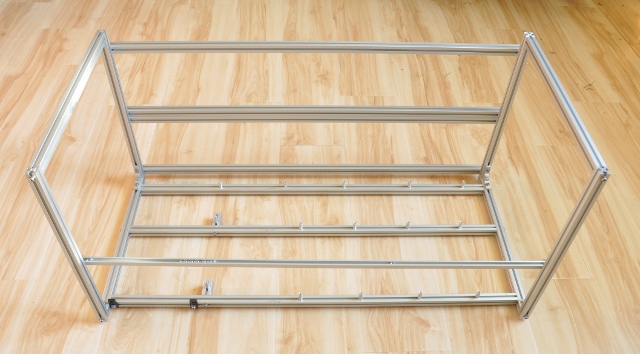
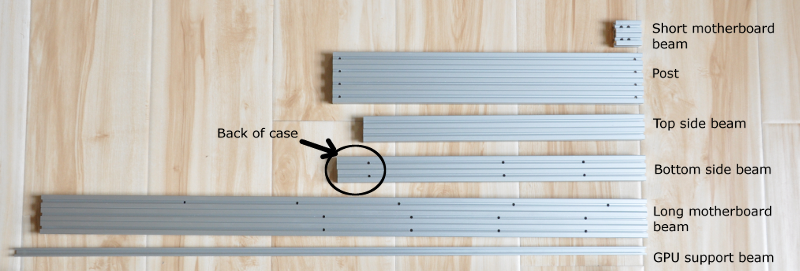
Parts
Assembly
Start M3x6mm bolts into the bottoms of the four posts.
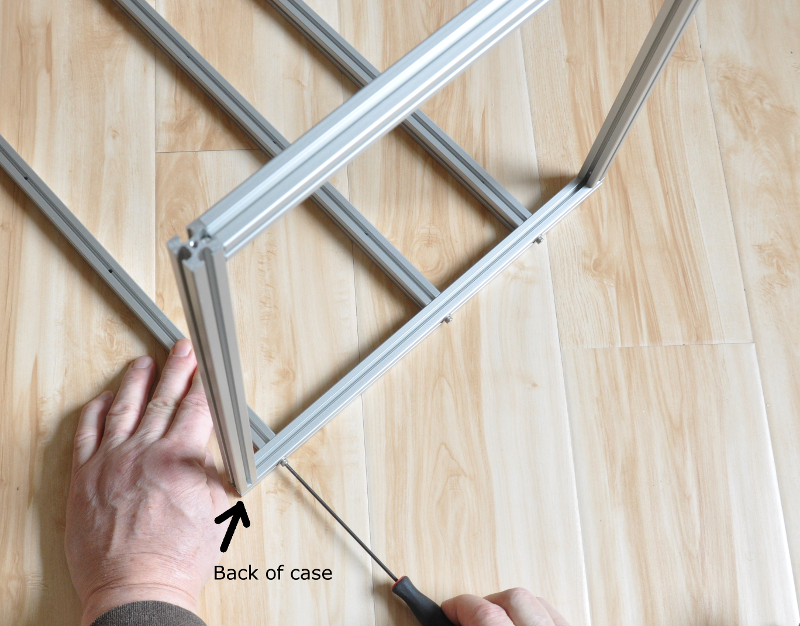
Attach a post to the back end of a short side beam, by sliding the head of the bolt into the top groove of the beam and tighten the bolt by inserting the wrench through the wrench access hole.
Attach a second post to the beam.
Insert a hex nut into the inside groove of the back post. (This nut will eventually be used to attach the GPU support beam to the post.)
Start M3x6mm bolts into both ends of the two top beams.
Insert the top beam bolts into the slots of the two side beam posts and tighten.
Attach the two short motherboard beams to the two long motherboard beams via M3x20mm bolt and washer.
Attach the three long motherboard beams to a side sub-assembly via M3x20mm bolts and washer.
Attach two plastic PSU tabs to the side face of the back long motherboard support beam via a M3x8mm bolt, washer and hex nut.
Attach the other side beam.
Insert 8 M4 hex nuts into the milled GPU support beam. To prevent the nuts from sliding out of the groove, “capture” them via two M4 Phillips head bolts.
Rotate the frame onto its back and attach the milled GPU support beam onto the inside face of the back posts using M4x14mm bolt, washer and the hex nut inserted earlier.
Flip the frame one more time, so its upside down and attach the four rubber feet via M3x6mm bolts and hex nuts.
Flip the case right-side up.
Attach the 15 hex standoffs to the frame using M3x20mm bolts.
The standoff location in the back short beam is the hole closest to the back of the frame.
The standoff location in the middle short beam is the hole closest to the front of the frame.
[INSERT PICS OF STANDOFF LOCATIONS IN THE TWO SHORT BEAMS]
Attach 8 black plastic fan/radiator tabs to the fan/radiator beam(s) via M3x8mm bolts, washers and hex nuts.
Attach the fan/radiator beam(s) to the frame via M3x20mm bolts, washers and hex nuts.
The PSU is attached to the frame with two #6-32 bolts and washers.


